Introduction
A common task for many MVC3 C# ASP .NET web applications is the creation of a login form. Along with the common login form comes an array of required functionality, including login validation, authentication, storing of credentials, and of course, security. In traditional C# ASP .NET web applications, protected pages would sit within a particular folder, designated by the web.config as a protected area. However, in MVC3 controllers rule the land and application folders may be virtual, thus requiring a controller-based security technique.
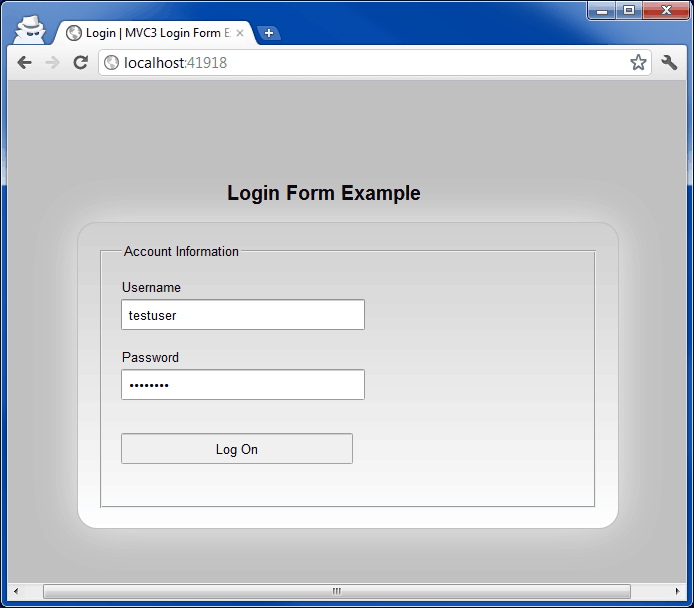
In this tutorial, we’ll walk through creating a slick login form for an example MVC3 C# ASP .NET web application. Our login form will be styled with CSS3, contain rounded edges, a gradient background, and a lens flare highlight effect. Our login form will also contain MVC3 form field validation for the username and password. Finally, we’ll authenticate the user with a custom membership provider and store the user details in cache for quick retrieval.
Classic ASP .NET Security
In a traditional C# ASP .NET web application, security is often implemented using the web.config authorization XML section. This allows you to define web application folder paths, allowed roles, and denied roles for accessing the specified folder within the web application. If a user is denied access, he is redirected to the forms authentication login page. For example:
1 | <location path="secure"> |
The above web.config block would only allow users with the role of “admin” to access the folder “/secure” in the C# ASP .NET web application.
MVC3 Security is a Little Different
While classic ASP .NET security uses the web.config folder-based approach for protecting a C# ASP .NET web application, MVC3 is quite different. Since an MVC web application relies on routing via virtual folder paths, the web application could not be configured via the web.config, since the folder paths do not actually exist. In fact, even using security based upon the routing itself, is discouraged, due to the complexity of verifying security for all possible combinations of routes within the MVC web application. This can be complicated even further when you consider all possible input combinations to the controllers that could result in different controllers being called.
Rather, the recommended method for securing an MVC web application is to use the [Authorize] attribute on specific controller methods that should be protected. For example, the following code enforces security on the Index() method for the particular controller, requiring a logged in user for access:
1 | [Authorize] |
We Can Do It Better
While the Authorize attribute can be used to protect specific controller actions within an C# MVC3 web application, it’s generally simpler to reverse the security. That is, decorate specific controller actions that are free to be anonymous (such as the login page), and leave all other controller actions secured. In this manner, any new controllers or actions that are created within the MVC3 C# ASP .NET web application will be automatically secured. The developer will need to explicitly decorate the action as [AllowAnonymous] in order for non-logged in users to access the page. This idea comes from Rick Anderson’s post.
For example, the following code explicitly opts-out of security, allowing any user to access the controller action for displaying the login page:
1 | [AllowAnonymous] |
Creating our MVC3 Security Framework
To get started, we’ll begin by implementing our AllowAnonmous attribute for decorating controller actions as anonymous (accessible by non-logged in users). We can create this new attribute by inheriting from the Attribute class, as follows:
1 | [AttributeUsage(AttributeTargets.Class | AttributeTargets.Method, AllowMultiple = false, Inherited = true)] |
The above code simply creates a basic AllowAnonymous attribute that can decorate any class or method (ie., controller or controller action). Later on, we’ll check the methods for this attribute to know whether we should enforce security or not.
Implementing the LogonAuthorize Class
Next, we’ll need to create an authorization filter, which gets added to the list of global filters in the MVC3 global filter collection. This tells MVC3 which classes to call to check for security on web requests, in addition to other tasks.
We can implement the LogonAuthorize class, as follows:
1 | public sealed class LogonAuthorize : AuthorizeAttribute |
The above code creates a new LogonAuthorize class that overrides the OnAuthorization method. When our C# MVC3 ASP .NET web application needs to check security for autorization, our global filter will get called. We’ll first check if the calling method contains the AllowAnonymous attribute, indicating that the method is accessible to all users (even non-logged in users). If it does, we’ll skip performing any security check. If the method doesn’t contain this opt-out flag, then we’ll assume security is enforced for this controller and continue with authorization.
Hooking into the MVC3 Global Filters
Finally, we can add the new LogonAuthorize filter to the list of MVC web application filters by using the following code within the Global.asax.cs file:
1 | public static void RegisterGlobalFilters(GlobalFilterCollection filters) |
Creating our Logon Page Controller
Now that the security framework is ready, we can create our logon page controller to allow the user to enter their username and password for validation. The logon controller will appear, as follows:
1 | public class HomeController : Controller |
The first important note in the above Login controller code is the two Index() methods. The first Index method is for displaying the login page. If the user is already authenticated, we simply redirect to the secure landing page controller. This is a handy shortcut for already-logged-on users, who access the web application at the root Url. If the user is not already logged-in, we display the login form.
The second Index() method above is called upon posting the login form details back to the MVC3 web application. We first validate the form fields (username and password) and display any errors, if needed. Next, we validate the user credentials with the MembershipProvider class. We then create the standard ASP .NET authentication ticket and login the user to the secure area.
A final item to note is the LogOff() method. This method is only available to logged-in users (since it doesn’t contain the [AllowAnonymous] attribute). The LogOff() method deletes any cache, containing the user details, and signs out the logged-in user.
The LogOnModel Class
The login form controller uses a class to hold the username and password details, called LogOnModel. We can define this simple class, as follows:
1 | public class LogOnModel |
Note the class utilizes MVC3 attributes to indicate styling and validation for the login form fields.
MVC3 Forms Authentication in the Web.Config
We’ll take a quick break here to add some configuration to the web.config file. We’ll need to enable MVC3 forms authentication, as well as define our custom membership provider class.
1 | <system.web> |
In the above example, we’ve simply defined a forms authentication block with a 20 minute sliding timeout. If the user remains inactive for longer than 20 minutes, he’ll be automatically logged out of the MVC3 C# ASP .NET web application. We’ve also defined our custom membership provider class for performing authentication.
Creating the MVC3 Custom MembershipProvider
In the login form controller, we make a call to Membership.ValidateUser() to perform the authentication. In order to make this call, we need to define a custom membership provider class, where our actual code for checking the username and password will reside.
Creating a custom membership provider in an MVC3 web application is actually no different than creating one in a classic C# ASP .NET web application. We’ll simply inherit from MembershipProvider and implement the required methods, as follows:
1 | public class MyMembershipProvider : MembershipProvider |
In the above code, the most important method is the ValidateUser() method. This is called automatically by the MVC3 .NET web application framework to validate our user’s credentials. We add our custom code to check the username and password. You would probably be checking against a database, stored procedure, or web service to perform your actual authentication.
Remembering the User Id
Once the username and password is verified, we add the Username and User ID to the cache for quick retrieval later on in the application. We’ll provide the user details in the GetUser() method. This is accessible from anywhere in the MVC3 application. For example, to retrieve the user id, the following call can be used:
1 | Membership.GetUser().ProviderUserKey |
Since the user details are stored within the cache, it saves us an extra step of hitting the database for each call for the user’s details. Once the user logs out, we’ll remove the cache entry, as well as delete the forms authentication ticket.
Synchronizing the User Cache with Forms Authentication Timeout
It’s important to note the sliding timeout value set on the Cache.Add() call. We use the same timeout value as the FormsAuthentication.Timeout value (in our example, 20 minutes). This allows us to expire the cache at the same time as the MVC3 forms authentication ticket. However, this will only work if every page request is loading the user details. Otherwise, the cache could expire sooner than the forms authentication ticket. In our example, the user’s name and id are displayed in the top menu of the secured area, which results in a call to the cached data in GetUser() for each page view. This optimizes our web application for speed.
Since our MVC3 web application now relies on cache information for retrieving the user id (in addition to the regular forms authentication ticket), we’ll need to add a check in Global.asax.cs to make sure the cache is available upon request. You can modify the Global.asax.cs to add the following code:
1 | protected void Application_AuthenticateRequest(object sender, EventArgs e) |
Creating a Simple Custom MembershipUser Class
In our custom MembershipProvider class, when we return the user details via GetUser(), we’re actually returning a custom MembershipUser object, named MyMembershipUser. This is a shortcut class that wraps the base MembershipUser class with a simple username/user id combination. We can define it, as follows:
1 | public class MyMembershipUser : MembershipUser |
The above code allows us to create a new MembershipUser, with default values, by simply passing in a username and user id.
Our MVC3 C# ASP .NET web application security is now complete. We can now create the login form view and utilize some fancy CSS3 to spice up the form.
Creating the Shared MVC3 Layout View
We’ll start, as with most MVC3 web applications, by defining our master page, also called the Layout. We’ll define our basic layout with a CDN (content distribution network) link to the Google-hosted jQuery API, as well as a link to our default CSS stylesheet.
1 |
|
In the above code, we also render a partial view, which is our user control for the top menu (displayable only to logged-in users). The UserMenu.cshtml is defined as follows:
1 | @if (Request.IsAuthenticated) |
Note the call to Request.IsAuthenticated, which allows us to only display the menu-bar control to authenticated and logged-in users.
Detecting Internet Explorer in HTML
Before we create our MVC3 CSS3 enabled login form, we’ll need to detect Internet Explorer from other web browsers. While Chrome and Firefox offer support for most CSS3 features, IE9 may not support all commands. We can therefore, detect IE from other web browsers within the HTML with the following code:
1 | <!--[if !IE]><!--> |
The above code first checks if the web browser is not Internet Explorer, and if so, it includes the regular style-login.css file. If the web browser is IE, it instead uses the style-login-ie.css. All other styles (included in style.css) are shared by all web browsers for our web application. In this example, CSS3 is only used on the login form.
Designing Our MVC3 CSS3 Login Form
Our MVC3 C# ASP .NET login form view will be strongly-typed to our LogOnModel class. Since we’ll be using form validation, we’ll include two CDN links to jQuery Validate and jQuery Validate Unobtrusive. We’ll also link to our login form css file, depending on the web browser, and display our form fields. The code appears, as follows:
1 | @model LoginFormExample.Models.LogOnModel |
Note in the above code, MVC3 will use the model’s attributes to determine validation on required fields. The above form fields will post to our HomeController’s Index() method for validation of the form fields and user credentials.
Mix in a Little CSS3 For the Slick Effects
We can add some style to the login form with the help of CSS3. Specifically, we’ll add rounded corners to the login form frame, a background gradient to the login form panel, and a light shadow behind the frame. We’ll also add a CSS3 transition effect to the input fields to give our MVC3 login form a slick look. The following styles are defined for the login form, and tested in Google Chrome and Firefox:
1 | .login-form-container form |
CSS3 and Internet Explorer 9
IE9 is slightly different with its support for CSS3. As such, we’ll need to change the login form styles to be compatible. In the above HTML code for the MVC3 view for the login form, we’ve added code to detect Internet Explorer in HTML. We can then provide the following styles, specific to IE:
1 | .login-form-container form |
After Logging In
We’ve finished our login form, complete with CSS3 gradients, rounded edges, and fancy form field animation. The final task is to create a simple secured page for our logged in user to access. We can define the SecureController, as follows:
1 | public class SecureController : Controller |
Note the controller’s method does not contain an attribute. Since it doesn’t contain the [AllowAnonymous] attribute, only logged-in users may access this method.
Our MVC3 Secure controller view, appears as follows:
1 | LoginFormExample.Models.SecureModel |
You can continue from here to create additional controllers, views, and pages accessible only by logged-in users.
See It In Action
Download @ GitHub
You can download the project source code on GitHub by visiting the project home page.
About the Author
This article was written by Kory Becker, software developer and architect, skilled in a range of technologies, including web application development, machine learning, artificial intelligence, and data science.
Sponsor Me